![[Photo de l'auteur]](../../common/images/Yves-Ceccone.jpg)
by Yves Ceccone
About the author:
Was a photographer, changed to computer graphics, and never dropped the mouse since.
Content:
|
XMRM : Morphing with Linux
![[illustration]](../../common/images/article139/img_139.gif)
Abstract:
XMRM (Multi Resolution Morphing for X) is a morphing
program that allows one to create an mpeg video based on two
images, where one image transforms progressively (according to many
parameters) into the other. This article describes the principal
functions of the program (thanks to the very complete documentation
in English available on the XMRM site), as well as an example of a
small animation that shows how one can obtain interesting results
easily.
Installation
The version used in this article is from an RPM (on RedHat 6.0),
but you can also find the source distribution at
http://www.cg.tuwien.ac.at/research/ca/mrm/xmrm.html.
As well as the program itself, in order to save the animation as an
mpeg, you need to install "tifftopnm" and "ppmtoyouvsplit", which
are both in the package "netpbm01mar94", which you can find here:
ftp://ftp.x.org/contrib/utilities/ as well as "mpeg"
here: ftp://ftp.x.org/contrib/utilities/
The idea
The way XMRM works is as follows: you load two images, one called
"source" and the other called "destination". Then, using vectors,
you do a tracing on each image, where each point in the line on one
image corresponds to a point on the other image. These tracings
will determine the contours of the morphing. After you've chosen
the type of morphing, the quality, the number of steps (frames),
you "calculate" the animation, which you can then save as an mpeg.
Menu and principal functions.
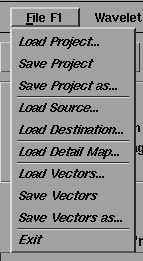
This menu serves a dual function since each command corresponds to
a button on the general interface.
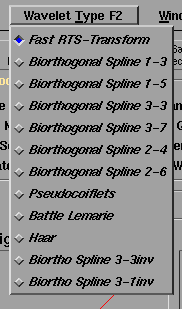
This menu allows you to choose the type of "wavelet," ie, the
type of transformation. The various choices are different image
transformation algorithms. "RTS-Transform" is sufficient in most
cases, especially for previewing. For high quality results, choose
in the range between Biorthogonal Spline and Battle Lemarie (which
go from the most complex to the slowest).
The three others can produce funny results.
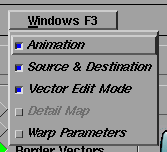
This menu allows you to hide or show the different work windows.

XMRM uses the TIFF format.

All of your settings, including the vectors, the names of the
imges, the parameters, etc, can be saved, loaded, and saved
as...
Projects are saved with the extension .prj; vectors are saved in a
separate file with the extension .prj.vec.

Swap the source and destination images as well as the vectors to
reverse the direction of the morph.

Load a black and white image to use the Detail Map Morph
function.
A color image will be converted into black and white.

Basic morphing by mixing the source and destination images.

This feature uses a black and white image along with the source and
destination. It allows you to control the progression of the
transformation: A white zone in the black and white image indicates
rapid transformation from source to destination, while conversely,
a black zone indicates slow progression.

Here only the source image is transformed based on the vectors.
Surprising effects guaranteed!

Allows you to create a sequence starting with the less detailed
areas of the source image and the less detailed areas of the
destination, to continue in the reverse direction and return to the
beginning to finish the cycle.

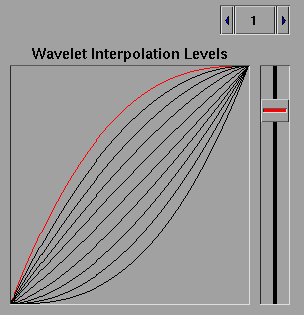
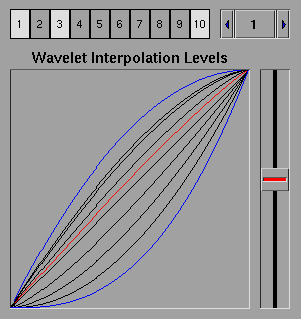
In advanced mode, the "wavelet-functions" can be selected and
configured separately; in the simple mode, 1 is always selected:

With the "high quality" option the calculation can take as much as
4 times as long...

This option positions invisible vectors on the four sides of the
two images (source and destination). This allows you to avoid
deforming the frame during morphing.

When this button is not pressed, conventional morphing is used.
This function determines the value of the source and destination
images for each image in the animation.
When it is activated, it uses the more advanced
"wavelet-transformations mode", which is configurable with the
"Advanced Mode" option.
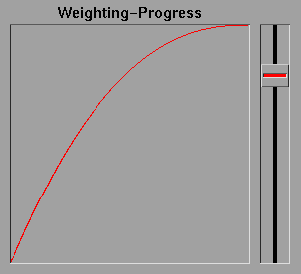
Morphing progress
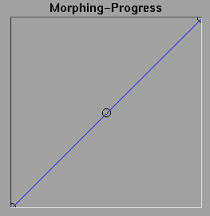
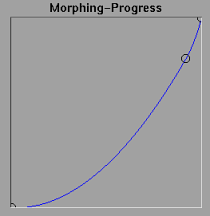
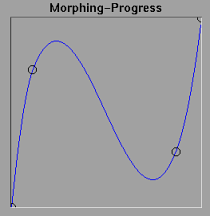
It's possible to modify the progress of the morph as follows: The
X-axis represents the time or the position of the image in the
animation: on the left is the source image; on the right is the
destination image.
On the Y-axis, on bottom is the source image and at the top is the
destionation image.
So, following the three examples below, you can have an even
progression, a progression where the destination image appears
towards the end, and finally one where you have a loop.
To add or modify the position of a point, use the left mouse
button; to delete, use the right mouse button.
Positioning the vectors
![[Positioning the vectors]](../../common/images/article139/img_139_24.jpg)

Once the two images are loaded, use the tools Edit, delete /vector,
and set /Line to trace the vectors that determing the contours for
the morphing of each image. The greater the number of vectors the
better the quality of the morph will be.
It is possible to have several tracings per image: for example, in
the official documentation, there is an example of morphing a bear
and a leopard where they have the contour of the head, plus the
outline of each eye, for a total of three tracings per photo.
Calculating the animation
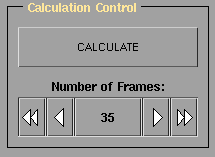
Here you determine the number of images (frames) that will
comprise the animation, which will determine how long it is (in
conjunction with the number of frames per second) and the rendering
(fluid, jerky...) of the animation.
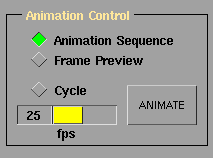
Here you set the number of frames per second (fps) as well as
whether the animation will loop, using the "Cycle" button.
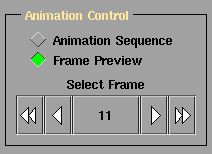
The "frame preview" option is for viewing a given image according
to its position in the animation.
Saving the animation
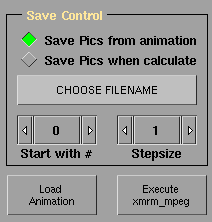
"Save pics from animation"--Save each frame as a tiff file
after the animation has been calculated. You must first choose a
directory and a base_filename.tif. (The save works like
base_filename000.tif; base_filename001.tif, base_filename002.tif,
etc...). "Save pics when calculate" -- Save the same files,
corresponding to each frame, but at the same time as the animation
is calculated. You must choose the file name before running
"calculate". This option gives you a much better color quality in
the images.
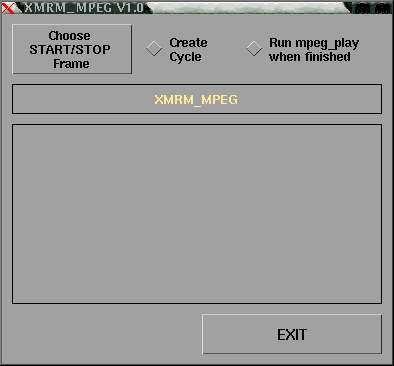
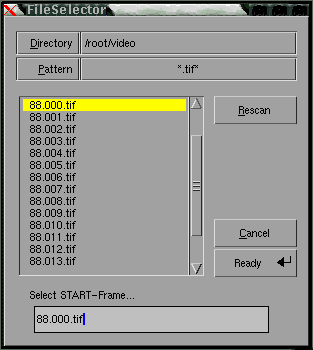
You call up this dialog by clicking "Execute xmrm_mpeg". You then
choose the first and last images of the animation using the "choose
start/stop frame" button, and click GO to start the final operation
for making the mpeg animation.
You can also create a loop, and start mpeg_play as soon as the mpeg
is created.
Create a morphing quickly
First, here are the two images you can download if you want the
same ones as in the example:
01.tif and 02.tif (90 kb
each)
![[The input files]](../../common/images/article139/img_139_32.jpg)
Click "Load Source" and load 01.tif, then "Load Destination" to
load 02.tif.
![[]](../../common/images/article139/img_139_33.jpg)

With the "Set vector" tool, do a tracing around the baby.
To use this tool, click the left mouse button, drag to draw the
vector, and release when you have the desired length.
You will see that one of the arrows at the top of the baby's head
is green. This is a reference point, which helps you draw and
position the same number of vectors on the destination image as on
the source. After we've finished the tracing on the first image,
when we start on the second, the tracing will have a green arrow
along the first line, and so make the job easier.
Here are the parameters I used to get an interesting result:
- Simple morph
- Border vector
- use wavelets
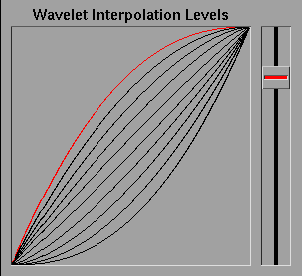
- The cursor "wavelet interpolation levels" raised to 3/4.
- The Morphing-progress rectilinear and centered
- Number of frames: 50
- "Animation sequence" checked and 25 fps
Now click "calculate" to generate the animation; you can view it
with the "animate" button to, and make modifications. Be careful:
rerunning "calculate" erases the previous animation.
Once you have a satisfactory result, check "save pics from
animation" and choose a file name and a directory. Here you will
save the 50 .tif files that are generated by the "ready" command in
the dialog box you open with "choose filename".
Last operation: Click "Execute xmrm_mpeg", choose filename000.tif
as the START-frame and filename049.tif as the LAST-frame and click
"GO" to create the mpeg file. This file will be called filename.mpg
and will be located in the same directory as the 50 tif files.

![[small animated gif]](../../common/images/article139/morph_small.gif)
Easy, no?
This animation (in full size) is downloadable here as mpg-file or as
animated gif.
Editors note: The compilation of xmrm with recent Linux distributions
is not straight forward. We have therefore compiled a list of tips:
Talkback form for this article
Every article has its own talkback page. On this page you can submit a comment or look at comments from other readers:
2001-09-04, generated by lfparser version 2.17
![[Photo de l'auteur]](../../common/images/Yves-Ceccone.jpg)
![[illustration]](../../common/images/article139/img_139.gif)


![[Positioning the vectors]](../../common/images/article139/img_139_24.jpg)


![[The input files]](../../common/images/article139/img_139_32.jpg)
![[]](../../common/images/article139/img_139_33.jpg)

